
Standard use of the Players
In this section, we will cover the key actions and features available for regular users when managing players within the Engage CMS.
Players represent the devices that display your content, and organizing them efficiently is critical for content scheduling and playback.
Navigation
The Players section provides a comprehensive overview of all players, allowing users to efficiently manage and navigate through them. Here’s how to use the page navigation features:
Grid/List View
- You can toggle between grid view and list view to display your players. The grid view shows players as visual tiles with thumbnails, while the list view displays them in a tabular format for more summarised and detailed information.
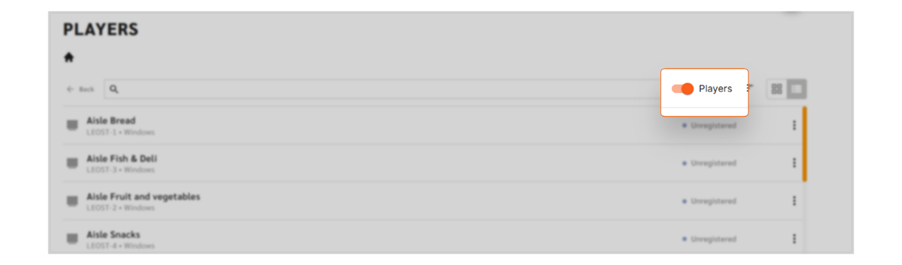
Toggle: Show only Players
- By default, groups (folders of players) will be visible in the player view. If you want to focus exclusively on the players, you can toggle the option to only show players. This will hide the player groups and display only the individual devices.
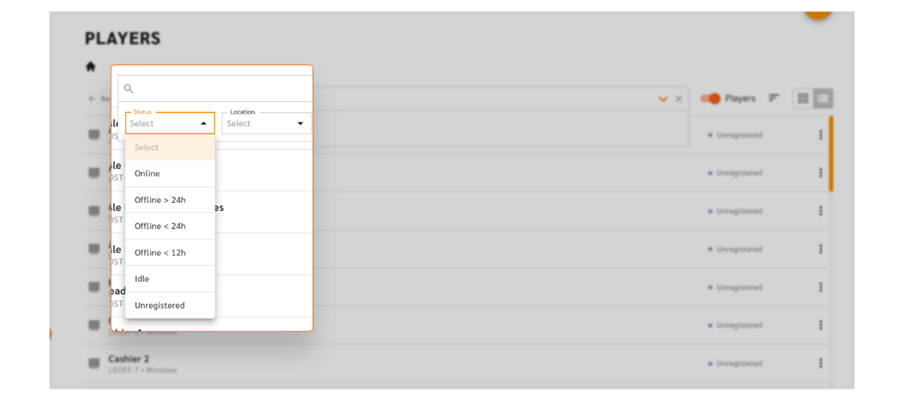
Search and Filter
Use the search field to filter players by various criteria, including:
- Device Status:
- Online: The device is functioning properly and is "healthy."
- Offline <12 hours: The device has lost connection for less than 12 hours. Contact Customer Care if the issue persists.
- Offline <24 hours: The device has been offline for more than 12 hours but less than 24 hours.
- Offline >24 hours: The device has been offline for more than 24 hours. Immediate attention may be required.
- Idle: The device is expected to be offline temporarily. It will be automatically marked "online" when the connection is re-established.
- Unregistered: The device is a placeholder, indicating the physical hardware has not yet been connected.
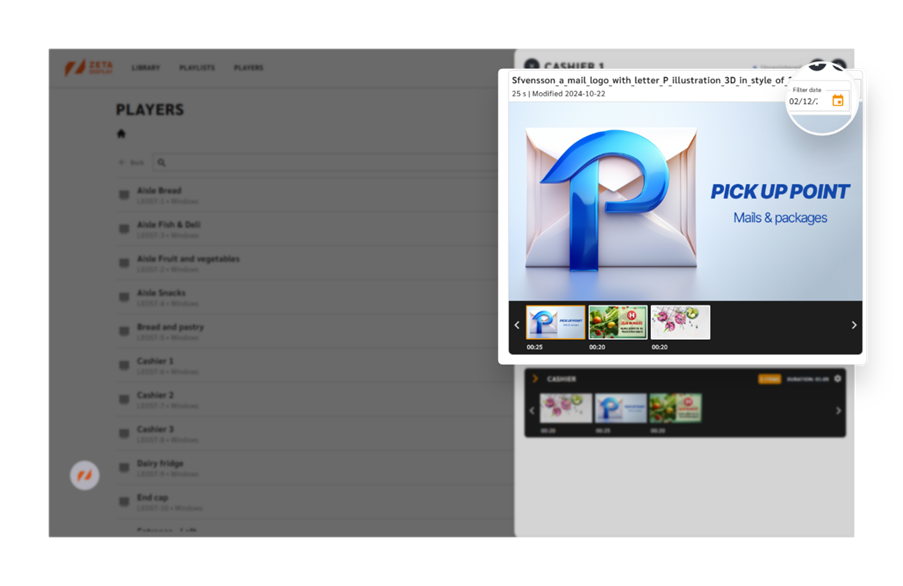
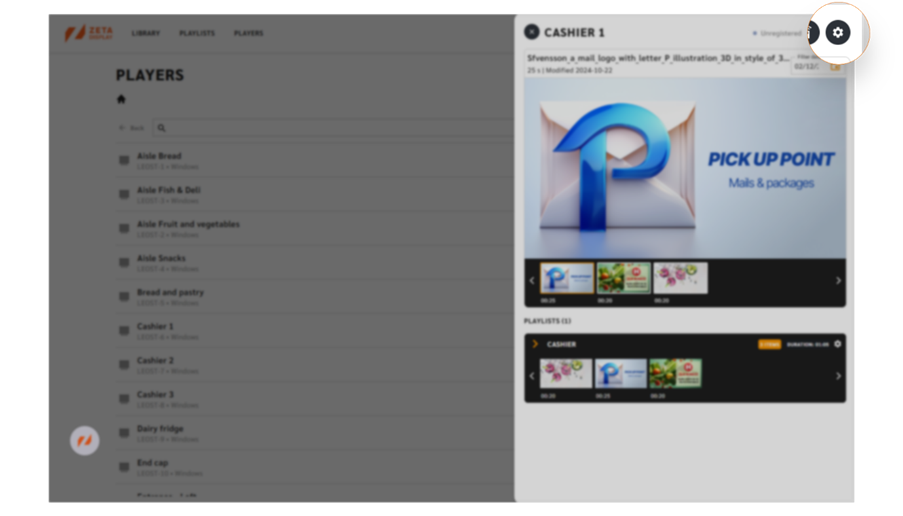
Player Sidekick
You can use the Sidekick tool to preview and manage your player and player settings remotely. Here's how to navigate sidekick:
Preview Content
- Selecting a date and time will display the expected content schedule for the selected period.
- You can preview the content order by clicking on specific media items. Skip ahead or preview the next item in the playlist.
- Note that this preview is for your reference only and does not affect the actual screen display.
Edit Playlist from the Player Sidekick
- If you notice that a playlist needs to be updated, or if content needs to be added or removed, simply click on the cogwheel to access the playlist settings quickly.
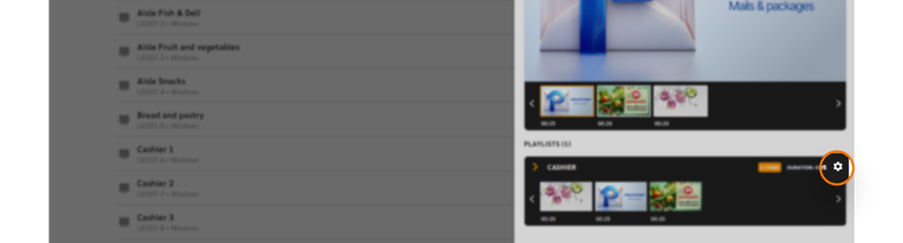
- To manage and edit playlists, please refer to the Playlist Management section in this document.
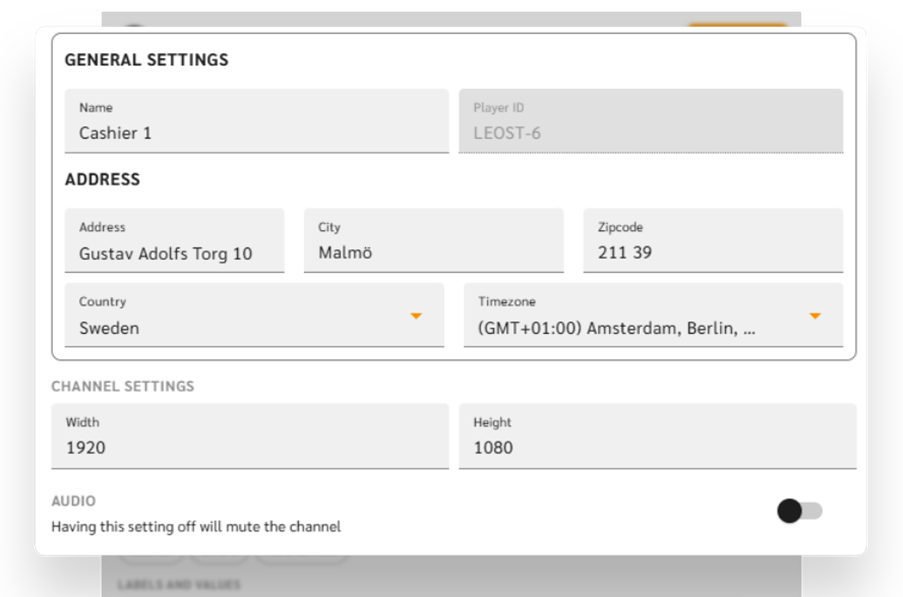
Player Settings
- Click on the cogwheel to access the player settings (if you have the required permissions).
- In this section, you can edit key details such as:
- Player Name
- Address Location
- Audio Toggle: This toggle allows you to turn the player’s screen audio on or off. Only users with the appropriate permissions can edit this feature while the player is accessible in the user's workspace.
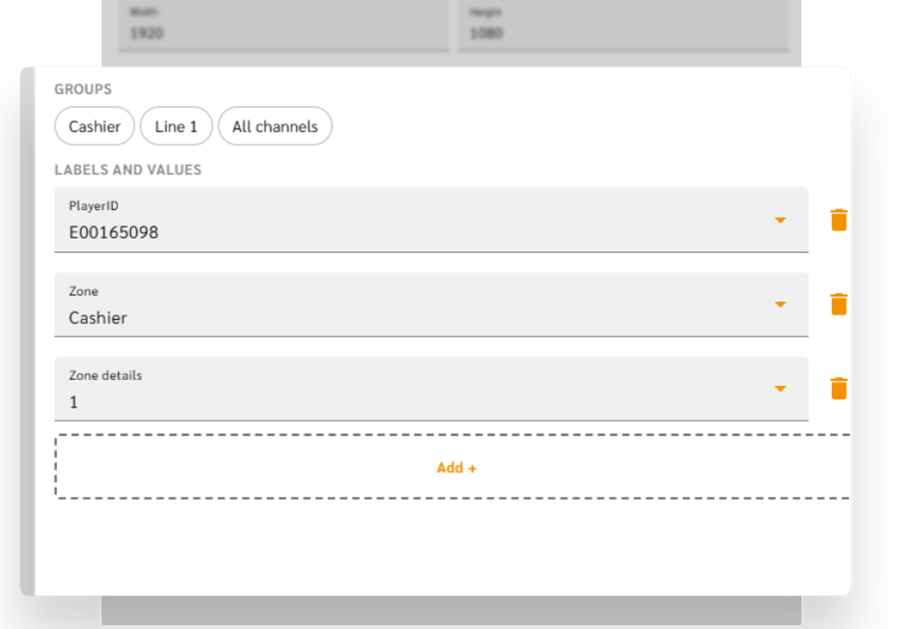
- Player Groups, Labels, and Values: Labels and values can be added or removed here.
Remote Control Sidekick
- To remotely control a player, click on the Remote Control Sidekick button. This feature is integrated into the system to allow remote management and monitoring of your devices.

Remote Control Overview
The Remote Control Sidekick provides a comprehensive suite of tools for managing players, including:
- View Device Information: Access detailed data for the selected device, such as:
- Device Name
- Device Type
- Device Model
- Software and Firmware Version
- Network Configuration
- Health Metrics (e.g., CPU and memory usage)
- Connectivity Status (e.g., network connection)
- Screen Capture: Request and view real-time screen captures from the device for troubleshooting or monitoring purposes. The captures are displayed in high quality with minimal latency.
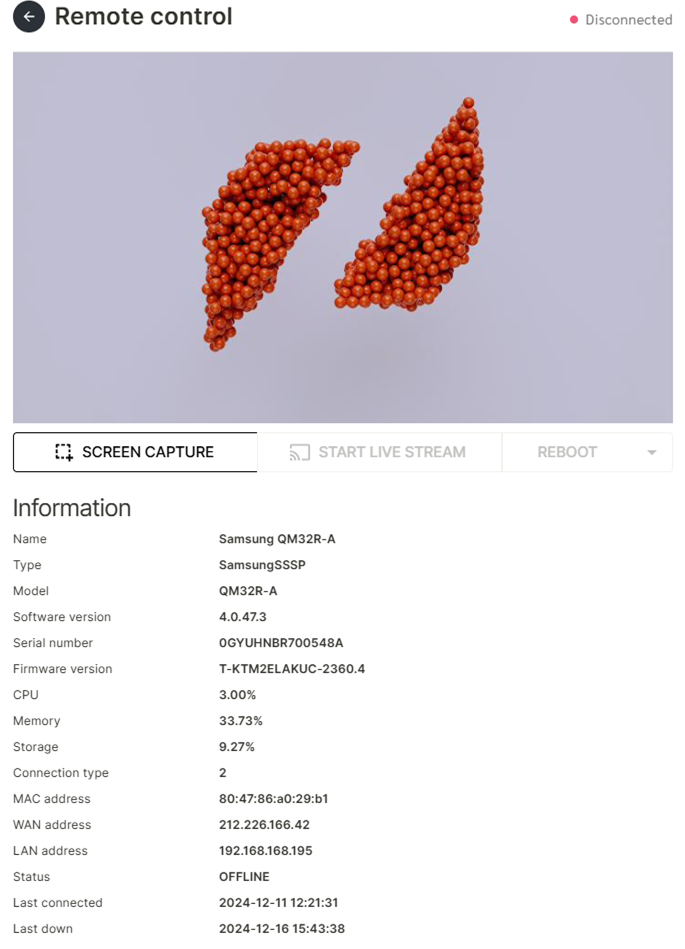
- Live Stream: Initiate a live streaming session to the device for real-time monitoring. Ensure smooth performance with minimal latency.
- Reboot Player: Remotely reboot the device when necessary. A confirmation prompt will appear before the action is carried out.
- For additional troubleshooting, click on the Reboot dropdown to access further actions for the player, including:
- Update Playlist
- Skip to Next Media
- Check Settings
- Check Display Controller
- Check Endpoints
- Send Logs
- Clear Live Data
- Clear Stored Media
- Reset Device
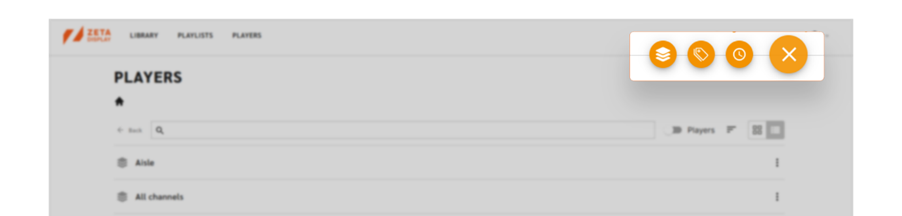
Action Button
The Action Button provides quick access to page-related options.
- Hover over it to reveal available actions specific to your Players.
Power Schedule
What is Power Scheduling?
Power Scheduling allows you to efficiently control the on/off status of multiple players at specific times, eliminating the need to adjust each playlist's schedule individually.
Creating a Power Schedule
- Hover over the Action button and click Power Schedule.
- Click Create New Primary Power Schedule.
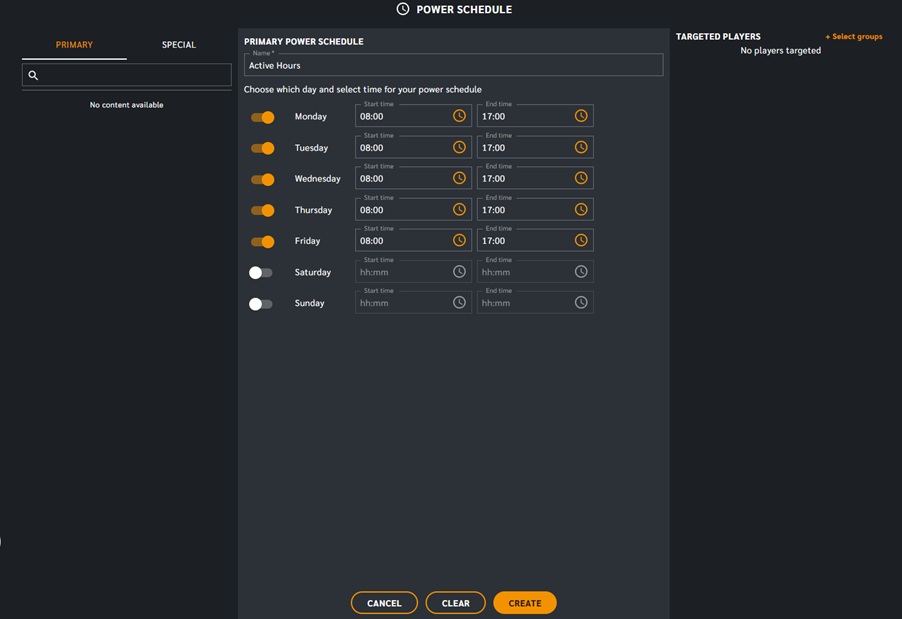
Primary Power Schedule
A Primary Power Schedule is used for regular operating hours, such as store opening and closing times.
- Set the days and times when the selected players should turn on and off.
- This ensures your digital signage aligns with business hours.
Special Power Schedule (Overrides Primary)
A Special Power Schedule is used for specific dates, such as extended hours, holiday events, or temporary changes.
- Special Power Schedules override the Primary Power Schedule.
- Easily switch between Primary and Special schedules for seamless schedule management.
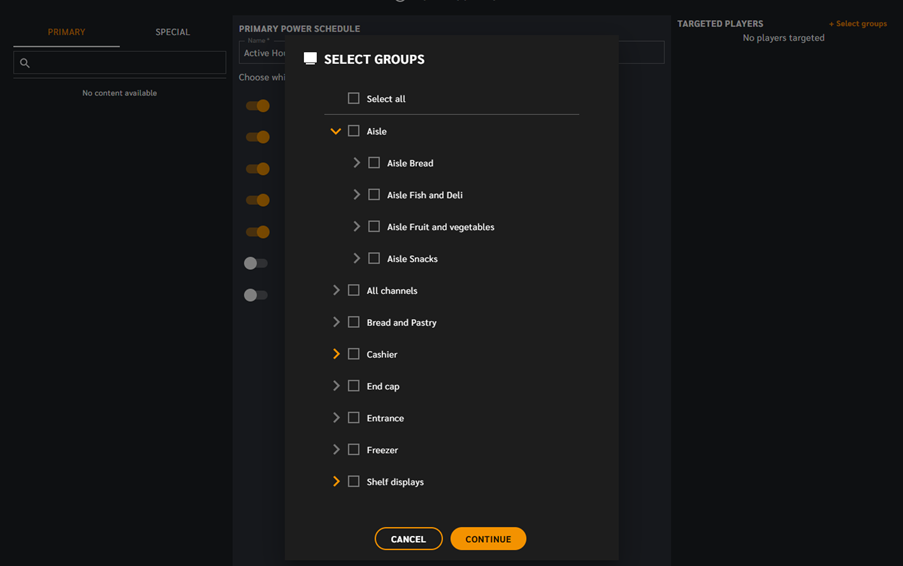
Assigning Power Schedules to Player Groups
- Select which player groups the schedule should apply to.
- The schedule affects players within the selected group, not the group itself.
Power Scheduling Hierarchy
The Engage CMS follows a multilevel scheduling system, where higher-level schedules take precedence over lower levels:
- Power Schedule (Highest priority)
- Playlist Schedule
- Individual Content Schedule (Lowest priority)
Lower-level schedules cannot override higher-level schedules.
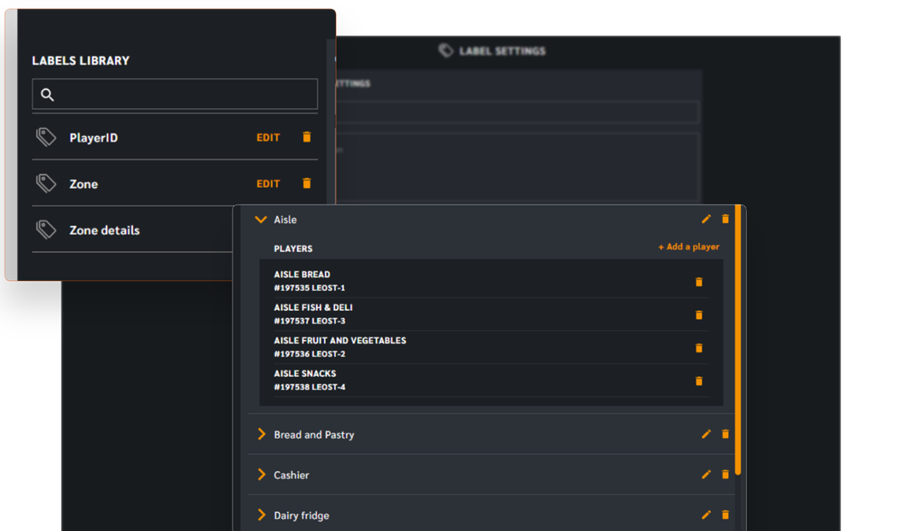
Label Settings
What Are Label Settings?
Label settings allow you to manage, edit, and create new labels for your players. Labels help categorize and organize players based on their location, function, or other relevant attributes.
Examples of Label Usage:
Zone:
The Zone Label contains values that represent player locations within a store or facility.
- Example values: Aisle, Cashier, Entrance, Exit
- Players are assigned to these values based on their physical location.
Assigning Labels to Players
- Multiple labels can be assigned to a single player.
- Labels ensure better filtering and organization of your digital signage network.
- Use labels to group players for scheduling, content targeting, and performance tracking.
Create a new player group
A Player Group is a type of folder used to organize players within the Engage CMS. Player Groups help manage multiple players collectively, ensuring efficient playlist distribution and scheduling.
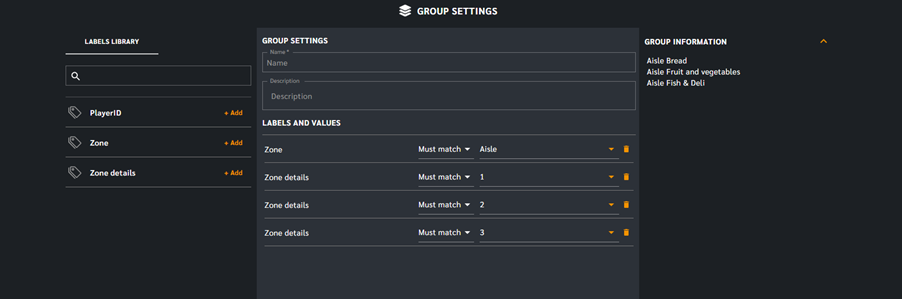
Creating a New Group
- Open the Action Menu – Hover over the action button and click "Create New Group."
- Name & Describe – Enter a clear name and an optional description for better clarity.
- Assign Labels – Select labels from the label library on the left.
- Set Label Values – Choose values for each label to define the targeted players.
- You can assign the same label multiple times with different values.
- Review Group Information – The Group Information panel on the right provides an overview of the targeted players based on the selected values.